Adding Budget Items

Contents
Throughout the Budgeting Process there are many times when Budget Items are created automatically in response to changes made elsewhere in the Scenario. Adding a Calculated Assumption for a new employee cost, moving or adding an employee funding source, or creating a new project or grant are all examples of when new Budget Items can be automatically created. The Scenario Recalculation process is usually responsible for actually creating new Budget Items. It is also very common to add Budget Items manually to create fixed or "lump sum" budgeted amounts. Revenue Budget Items often need to be added to provide Revenue for a new Grant that will have an Administrative Fee calculated.
|
![]() Add a New Budget Item
Add a New Budget Item
This example shows how to add a Budget Item that has no calculated accounts associated with it.
1.Click the Financial tab to select the main Financial grid.

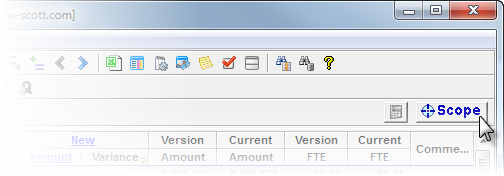
2.With the Financial tab selected, open the Scope window by clicking the Scope button on the Scope toolbar.
![]()
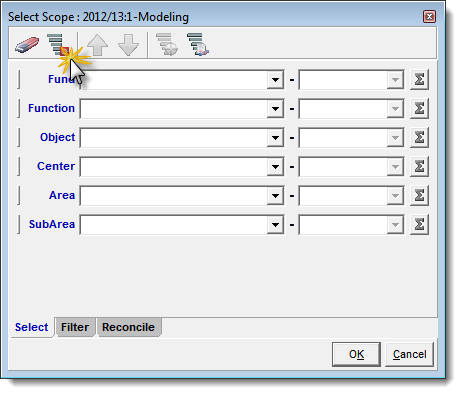
3.Within the Scope window, change the Scope to Modeling Scope Order by clicking on the Reset Scope button.
|
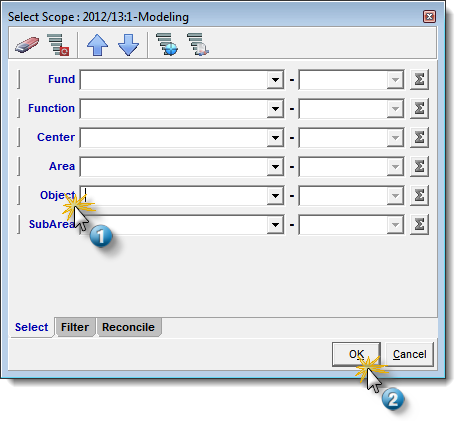
4.Select an appropriate Fund and Function Elements from the list boxes and making sure all the sum buttons are off, and click OK.

5.Within the Financial grid, right-click on one of Budget Items above the GL Account or "Object" and select Add Budget Item. Alternatively you may click the ![]() toolbar button on the main toolbar.
toolbar button on the main toolbar.

6.Using the Add Budget Item window, perform the following:
a.Select an Object Type by clicking on its corresponding option button. In our case, Expense.
b.Select an Object from the drop-down list box. In our example, '0410 - Consumable Supplies, Material'.
c.Enter the dollar amount of the new budget item in the Amount field.
d.Enter a comment describing why you are adding the new Budget Item.
e.Click Add.

![]() Results:
Results:
1.The new Budget Item is added to the Financial grid with a green plus sign next to it.
2.The dollar amount appears in the New Amount and Variance columns.

7.Save and Apply Changes by clicking on the ![]() button on the main toolbar, or selecting File -> Save Changes from the Main Menu.
button on the main toolbar, or selecting File -> Save Changes from the Main Menu.
8.In the Apply Adjustments window, enter a comment explaining why you are adding the Budget Item and click Apply.
![]() Results:
Results:
1.The Budget Item remains in the grid with a star-burst symbol next to it.
2.The New Amount is now in the Model Amount and part of the Budget Model.
3.Totals in the hierarchy reflect the new amount.

![]() Add a new Budget Item (with Assumption Calculations)
Add a new Budget Item (with Assumption Calculations)
Follow this example when you need to add a Budget Item such as a Salary Account that has associated Assumption Calculations configured.
1.Click the Financial tab to open the Financial grid.
2.Open the Scope window by clicking the Scope button on the toolbar.
![]()
3.With Scope window, change the Scope to Modeling Scope Order.
|
4.Select appropriate Budget Elements from the list boxes making sure the summing buttons are off or gray. Click OK.
5.Right-click on a Budget Item and select Add Budget Item.... Alternatively you may click the green ![]() button on the main toolbar.
button on the main toolbar.
6.Within the Add Budget Item window, perform the following:
a.Select an Object Type by clicking on its corresponding option button. In our case, Expense.
b.Select an Object from the drop-down list box. In our example, '0111 - Licensed Salaries'.
c.From the Area drop-down box list, select an item like '242 - World Language'.
d.Enter the dollar amount of the new budget item in the Amount field.
e.Enter the description of the new budget item in the Comments field (at least 10 characters).
f.Click Add.

![]() Results:
Results:
1.The new Budget Item is added to the grid with a green plus sign next to it.
2.The dollar amount appears in the New Amount and Variance columns.
3.Calculated or Budget Items are added based on the Assumption Calculations from the Assumptions tab.

7.Save and Apply Changes by clicking on the ![]() button on the main toolbar, or selecting File -> Save Changes from the Main Menu.
button on the main toolbar, or selecting File -> Save Changes from the Main Menu.
8.In the Apply Adjustments window, enter a comment explaining why you are adding the Budget Item and click Apply.

9.If prompted to Create Persistent Adjustments as shown below, click Yes. This assures that the new Budget Items will their the adjustment reapplied the next time you perform a Scenario Recalculation.
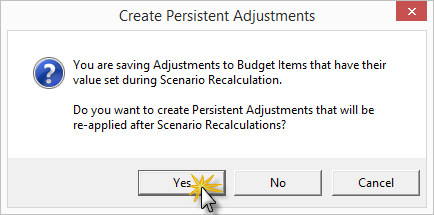
For more information about Persistent Adjustments, see the Sessions and Adjustments topic. |
![]() Results:
Results:
1.The Budget Items and any Calculated Budget Items appear in the grid.
2.Totals in the grid reflect the new Budget Items.

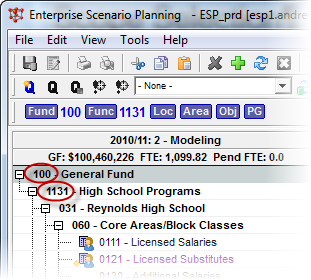
Modeling Scope Order is the arrangement of Budget Elements with the GL Account, or Object, being the lowest required element in the Scope. In the Financial Grid, this order provide a clean uncluttered look when looking at full details. When the last Budget Element is flagged as optional, ESP™ will show it within the grid hierarchies only when that element's Id is not equal to its default.
1.With the Financial grid selected, open the Scope Selection window by clicking the ![]() ,Scope button on the Scope toolbar, or select View>Scenario Scope... from the main menu.
,Scope button on the Scope toolbar, or select View>Scenario Scope... from the main menu.
![]()
2.In the Select Scope window Ctl-click on the Set Default Scope button in the Toolbar to ensure your default Scope is set.
3.In the same window, holding the left mouse button down, click and drag the Object element to the bottom position of the list, and click OK.
![]() Results:
Results:
1.Your Financial Grid now shows your selected scope ordered with the Object element as the last Element in the hierarchy.
Scope selection, summing, and filtering are available for the Financial, Employee, Salary Plan and Project/Grant components. Options for selecting and filtering are determined by the grid from which you are selecting Scope.

Scope Bar

Scope Selection Window
Item |
Icon |
Description |
From Id |
|
These drop-down lists can be used to select from the existing elements in the specific Element List. You can also enter Element criteria using * and ? wild-cards, a comma-separated list of values, a hyphenated range of values, or a combination of these criteria |
To Id |
|
When the corresponding From Element Selection contains a specific Element, these drop-down lists can be used to select a range of Elements. These boxes become disabled when wild cards or comma-separated elements exist in the corresponding From Element Selection. |
Group By/Sum Button |
|
It is sometimes desirable to work with less detail in the Scenario than what the full Budget Element String provides. These buttons enable the corresponding Element element to be "summed" or rolled up to the Element immediately above. When the button appears "out", and the Sum symbol is Red, summing is disabled. When a sum button is clicked, it depresses and the symbol turns Green indicating Summing will occur for the corresponding Element. When Summing is enabled for a Element, all those below it become enabled. When Summing is disabled for a Element, all those above it become disabled. |
Element Gripper |
As an alternative to using the Select/Group By Order button, you can simply click and drag the Element selection's bar to where you would like to place it in the Element String |
|
Default Order |
To set the full Element defaults and clear any filtering, click this button. The normal Element order is set, all summing is disabled, and filters are cleared |
|
Scope Tabs |
Switches between the Element Selection, Filter, and Reconcile criteria. |
![]() Selecting a Scope
Selecting a Scope
This procedure is applicable to Scope selection from the Financials or Employees grid.
1.If the Scope window is not open, click the Scope button from the Scope toolbar.
2.Make sure you are in the Select tab, click the Default Button, and then enter the Budget selection as shown below. Click OK.
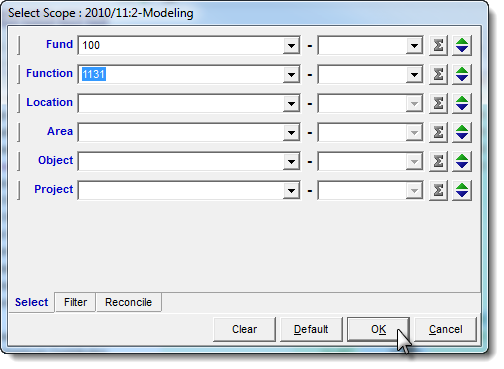
3.Verify the Element Scope is shown for your selection.