Changing Budget Items

Contents
To change or "Adjust" a Budget Item, the simplest method is to enter a new value in the New Amount column. Adjusting a Budget Item when there are no summed elements in the Scope will apply the new amount to that specific item and no others. It is possible to adjust multiple Budget Items at one time when there are summed elements in the Scope creating a Spread Adjustment.
When adjusting Budget Items, the adjustment can be made using either the New Amount or Variance column. The New Amount column is used to set the amount to a new, fixed value and the Variance column is used to enter an offset or "Delta" to be added to the Model Amount column. If a % sign is included in the Variance adjustment, the New Amount will be calculated from the percent value entered. Negative values can be entered in the Variance column to reduce the item amount. Generally, Expense items must always be positive and Revenue or Equity items negative.
|
![]() Changing a Budget Item
Changing a Budget Item
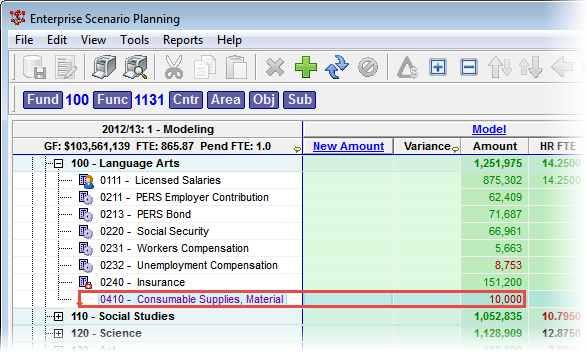
1.On the Financial tab, setup your Scope to a non-summed, Ideal Scope, having the Object Element at or just above the bottom Element, and no elements summed.
2.Locate a budget item that is not Calculated or Rollup, and in the New Amount column enter the new dollar amount for the Budget Item, and press the Tab or Enter key. Calculated and Rollup Budget Items appear with a glyph next to them in the tree column of the grid.
|
3.Enter the new dollar amount of the Budget Item (omitting commas and the dollar sign), and press Enter or Tab.
![]() Results:
Results:
1.A variance or "Delta" amount is calculated in the Variance column. The Variance tells you the difference between the New Amount that you entered and the Model Amount.
2.A green pencil symbol appears next to the budget item you adjusted.
4.Save and Apply Changes by clicking on the ![]() button on the main toolbar, or selecting File -> Save Changes from the Main Menu.
button on the main toolbar, or selecting File -> Save Changes from the Main Menu.
5.Enter a note in the Apply Adjustments text box (at least 10 characters), and click Apply to finish saving your changes.
![]() Results:
Results:
1.The dollar amount moves to the Model Amount column from the the New Amount column.
1.Totals in the summary rows reflect the changes.