Cloud Services Windows Desktop Icons

Contents
![]() Setting up desktop icons for ESP Cloud Services
Setting up desktop icons for ESP Cloud Services
To setup Remote Apps and to create ESP shortcuts directly onto your Windows Desktop, follow these instructions:
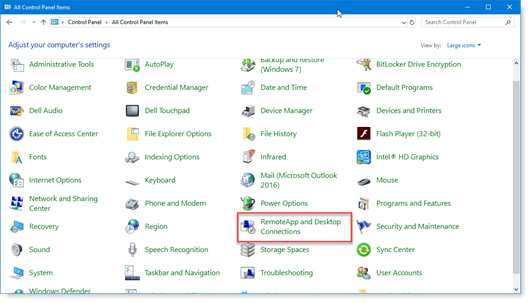
1. Open Windows Control Panel and then open the Remote App and Desktop Connections sub-menu.
2.Click on RemoteApp and Desktop Connections.
3.In the RemoteApp and Desktop Connections window, enter the following into the Email address or connection URL field: https://cloudapp.espaxis.net/RDWeb/Feed/webfeed.aspx
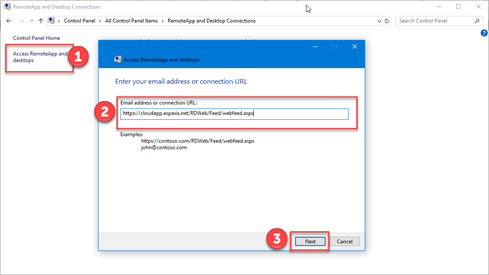
4.Click ‘Next’ on the next window to confirm. You will then be prompted to enter your ESP Cloud Services User Name and Password.
|
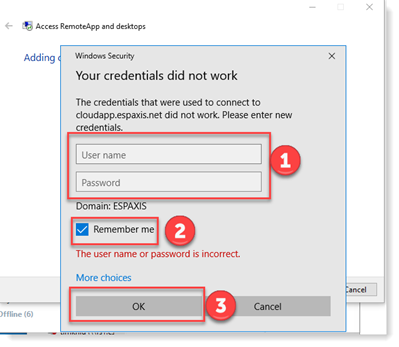
Note: You can check ‘Remember Me’ if you do not want to be prompted for your user name and password every time you start ESP. You may need to check the network policies for your organization before checking this. |
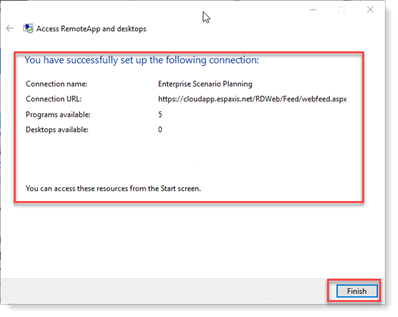
5.Your workstation will prompt you for your ESP Cloud Services User name and Password and will try to connect to the ESP Cloud server. If successful, you will see a summary window displaying details about the new remote applications.
|
6.Click ‘Finish’ to show the Enterprise Scenario Planning Remote App workspace.
7.Click on View Resources to open a new folder containing the ESP Cloud Services shortcuts.
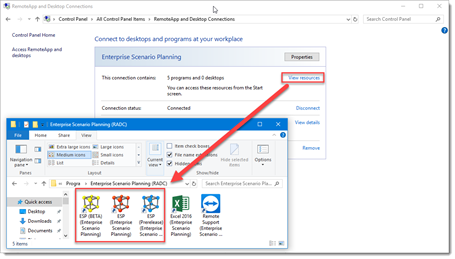
8.Now you can drag the shortcuts you want to your Desktop or other location and you will then be able to launch ESP from directly from there.