Spread Adjustments
A Spread Adjustment is created when the current Scope has one or more of its elements summed. With a "Summed Scope", Budget Item values represent a level of grouping or summary of individual Budget Items as defined in the Scope. It may be very convenient to apply an adjustment across a Summed Scope rather than creating potentially hundreds of individual adjustments. When creating Spread Adjustments, the net amount is allocated proportionately, or "Spread," across the Budget Items represented in the summary.
When entering adjustments to a summarized Scope, a preview of the Spread distribution is shown in the main grid. This preview gives you a chance to assess the impact of the adjustment before saving and applying it. If you are satisfied with the adjustment, you can save it as you would any other Budget Item adjustment. I you do not want to apply the adjustment, just remove the adjusting entry in the main grid.
![]() Making a Spread Adjustment
Making a Spread Adjustment
1.Click the Financials tab to open the Financial grid.
2.Within the Financial grid, open the Select Scope window by clicking the Scope button ![]() on the toolbar.
on the toolbar.
3.Within the Select Scope window, while pressing the CTRL Key, click the Clear Scope Elements button ![]() on the Toolbar to clear any previous Scope entries.
on the Toolbar to clear any previous Scope entries.
4.Arrange the Elements so that the order begins with Fund and GL Account or "Object". You can do this by clicking on an element and dragging it to its proper location.
5.Click on the Sum button in the element below GL Account or "Object" so it and the other buttons below it show a green sigma or "sum" symbol and click OK.

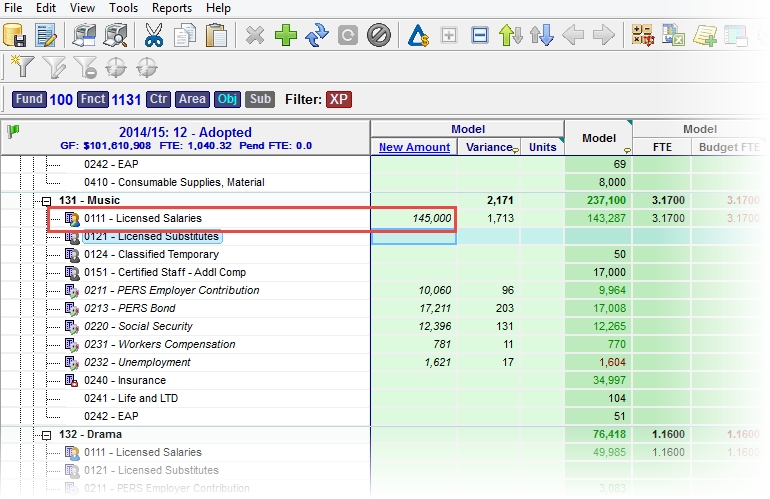
6.In the main grid, locate a Budget Item you want to adjust and enter an amount (a positive or negative dollar amount or percentage) in its Variance column or a new amount in the Amount column. Press Enter or Tab.

![]() Results:
Results:
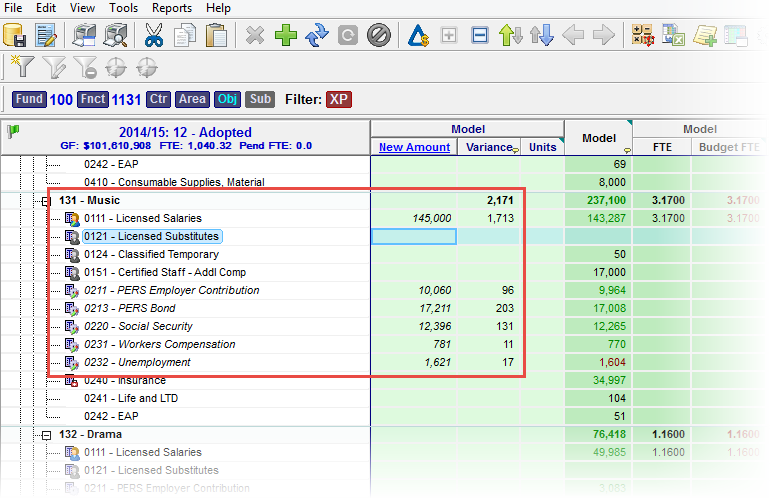
a.The New Amount column shows the calculated amount the Budget Item will be set to.
b.The adjustment may have triggered calculations to other Budget Items based on the Assumptions configured. In the example shown, adjusting the Licensed Salaries triggered calculations to other Budget Items (shown in italic numbers) corresponding to the item we adjusted.
c.A green pencil symbol appears next to any Budget Items that were adjusted.

7.Save and Apply Changes by clicking on the ![]() button on the main toolbar, or selecting File -> Save Changes from the Main Menu.
button on the main toolbar, or selecting File -> Save Changes from the Main Menu.
8.If prompted to Create Persistent Adjustments as shown below, click Yes. This assures that the new Budget Items will have their the adjustment reapplied the next time you perform a Scenario Recalculation.

9.Enter a note in the Apply Adjustments text box (at least 10 characters), and then click Apply to finish saving the record. You also have the option of Recalculating Current Scope at this point.
![]() Results:
Results:
1.The dollar amounts move to the Model Amount column from the New Amount columns.
2.Totals in the grid are updated to reflect the new Amounts.
3.A red pushpin glyph is now visible to indicate a Persistent Adjustment exists for that particular Budget Item.

